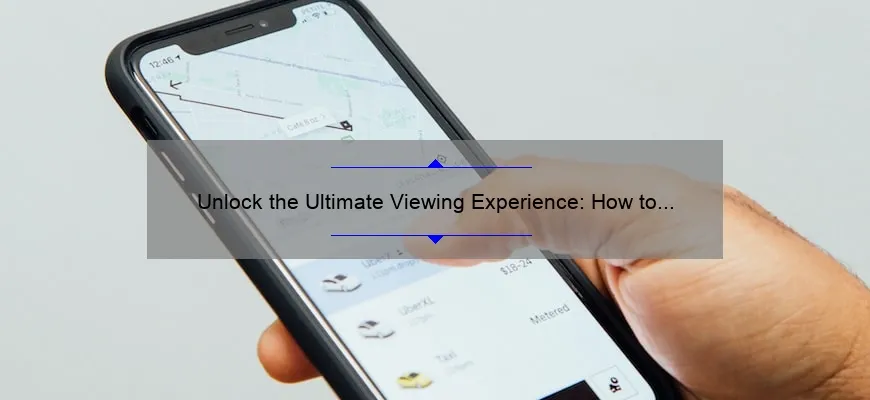
What is how to hook iPhone to TV?
How to hook iPhone to TV is the process of connecting an iPhone device to a television set. This can be achieved through various methods, such as using an HDMI cable, Apple AirPlay, or Chromecast. It allows you to stream content from your iPhone on a larger screen for a better viewing experience.
Some must-know facts about how to hook iPhone to TV are that the method used will depend on the type of TV and phone models. HDMI cables offer the best video quality but require wired connection, while wireless options like AirPlay and Chromecast provide convenience but may have limitations in terms of compatibility. Additionally, enabling screen mirroring on your iPhone and selecting the correct input channel on your TV are important factors in successfully connecting your devices.
Step-by-step instructions: How to hook your iPhone to the TV without any hassle
We’ve all been there – wanting to watch our favorite shows or movies on the big screen but not having an Apple TV or other smart device to do so. Fear not, because hooking your iPhone up to your TV is actually a lot easier than you might think! Follow these simple steps and you’ll be binge-watching in no time.
Step 1: Invest in a Lightning Digital AV Adapter
Before you can connect your iPhone to your television, you should purchase a Lightning Digital AV Adapter. This small accessory connects to the charging port on your iPhone and has an HDMI output that can be plugged into a compatible input on your television. Genius!
Step 2: Connect the Adapter to Your Phone
Once you have your adapter, grab your iPhone and plug it in. Make sure the adapter is securely attached to both the charging port on your phone and the HDMI cable that will go into your TV.
Step 3: Plug Everything In
Now it’s time to get everything set up! If you haven’t already, plug one end of an HDMI cable into the adapter and then securely connect the other end of the cable into an open HDMI port on your television.
Step 4: Change Your Television Input
Almost there – now all that’s left is changing the input channel on your television until you find where your phone’s display is being mirrored onto it. Depending on what kind of television model you have, this step may differ slightly.
Step 5: Enjoy!
Congratulations, you’ve successfully hooked up your iPhone to your television! You can now enjoy streaming services like Netflix, Hulu or Amazon Prime directly from your phone without any pesky cords getting in between. Want some ideas for what shows or movies to watch? Try binging Bridgerton or check out some classic films like The Godfather or Casablanca.
In conclusion, just because you don’t have fancy smart electronics doesn’t mean you can’t watch your favorite content on a big screen. Thanks to the Lightning Digital AV Adapter and an HDMI cable, you can leverage your iPhone’s portability into a cinematic experience that’s sure to wow!
Frequently asked questions about connecting iPhone to TV: Troubleshooting tips and more!
Connecting your iPhone to your TV can be a great way to share photos, videos, and even stream movies and TV shows on a bigger screen with family and friends. However, many people run into issues when trying to establish this connection. Whether it’s through AirPlay or an HDMI cable, there are often common questions that arise when attempting to connect your iPhone to your TV. Here are some frequently asked questions and troubleshooting tips to help you successfully connect your iPhone to your TV.
1. How do I connect my iPhone to my TV?
There are several ways you can connect your iPhone to your TV including using an HDMI cable or through wireless methods like Apple’s AirPlay. For an HDMI connection, simply plug one end of the cable into the HDMI port on the back of the television and the other end into the lightning port on your iPhone via an adapter. With AirPlay, ensure both devices are connected on the same Wi-Fi network, open Control Center on your iOS device by swiping up from the bottom edge of any screen then tap Screen Mirroring icon and select Apple TV from the list.
2. What if my TV doesn’t have an HDMI input?
If your television does not have an available HDMI input port, you may need to purchase an adapter that will allow you to use another type of port such as VGA or composite cables.
3. Why is my screen sharing blurry or choppy?
This could be due in part by poor connectivity speed between both devices caused by two most common constraints – either low wifi speeds or limited processing power of older iPhones incapable of responding swiftly during mirroring sessions with high-resolutions used often in gaming apps for example; consider turning off unnecessary apps or switching off background activity before initiating screen mirroring.
4. How can I fix buffering issues while streaming content from my phone?
Buffering issues whilst streaming from phones can become frustrating especially while attempting large files so it is necessary check internet connectivity to rule out Wi-Fi connection issues. Consider also approaching content file size with patience and allow it time to catch up before pressing the play button again.
5. Can I charge my iPhone while it’s connected to my TV?
Yes, you can connect your phone to a TV using an HDMI cable whilst simultaneously charging the phone by connecting another lighting cable port that way it stays fully charged for longer sessions without fear of running out of battery.
Connecting these two devices is an exciting way to share content from your phone on a big screen for most users, but as with new technology comes new questions – so keep some of these tips in mind as you attempt better success rates in establishing this connection.
Top 5 things you need to know before attempting to connect your iPhone and TV
When it comes to sharing digital content, connecting your iPhone to TV can be a game-changer. With the ever-increasing screen size of modern televisions, you can now enjoy your favorite apps, photos, and videos on the big screen without straining your eyes.
However, before you embark on this endeavor of connecting your iPhone to a television set, there are some things that you need to know. Disregarding these subtle yet crucial details may lead to frustration or even misconnection.
Here are the top five things you need to keep in mind before attempting to connect your iPhone and TV:
1. Compatibility is key
Before anything else, check compatibility; this is perhaps the biggest and most crucial factor that determines whether or not you can connect an iPhone with a particular TV. You’ll need either an HDMI or VGA port on the back of the television for this purpose.
In general though, newer versions of iPhones already support video output through interfaces like AirPlay or via adapters such as Lightning-to-HDMI cables.
Although older analog TVs may require an RF modulator so they can accept digital signals from more recent devices like the Phone— however this only works for devices prior iOS 11 offers an option in its settings menu where users can activate “Legacy Video.” So make sure you’ve checked for compatibility before making any purchases or expecting a seamless connection process.
2. Obtain necessary cables and adapters
Speaking of compatibility – once established – don’t forget about cables! This isn’t usually too much trouble since most major electronics suppliers sell adapter cords Especially if one wants automatic start-up by pressing ‘cast’, but double-checking isn’t going to hurt anyone! Make sure you get one regardless if the cord at hand won’t connect automatically with no issue!.
Also note that HDMI connectors tend will almost always provide higher quality than VGA (under ideal conditions); thus becoming currently industry-standard high-defintion connector which delivers both components over same cable.
3. Setting up the Connection
Once you have compatible cable(s) and an adapter in hand (if necessary), it’s time to get started! This part of the process differs based on whether you are using an analog TV (via a VGA or composite connection) or a modern, digital display such as an LCD television.
Therefore, switch off all devices before attempting connection setup, then start by plugging in the appropriate cables into your iPhone’s Lightning port/Apple TV HDMI Port and into your television. Next turn on both devices, and select input or source through which Apple device is going to be displayed – this can either be done via physical buttons on these respective devices themselves or remote controls).
4. Approvals Necessary for Display Settings
To establish successful connectivity before sharing any audiovisual display compatibilities; double-check settings within iOS itself ahead of time try tapping-settings>display and brightness>HDMI output where you may need to toggle-enable ‘Legacy Video Out’, or even make changes to resolution directly through the phone settings.
Consult manual guide supplied with Apple Adapter or any other A/V equipment manufacturer’s plugs explaining more technical configuration information.
5. Choosing Your Content!
After working out all those technicalities, enjoy content like never before!. Make sure Wi-Fi network nearby is secure estalbished so that there isn’t too much lag whilst streaming high-quality media – after that it’s smooth sailing– browse Netflix site or open YouTube app loaded up with videos ready for viewing! Anything else accessible will work too if the app supports mirroring options.
So before embarking on connecting your iPhone to a television set make sure to go through these points mentioned while deciding hardware compatibility at hand – one cannot overstate the importance of preparing adequately beforehand for seamless results throughout screen-time usage!
Expert advice: How the right cable can make all the difference when connecting your iPhone and TV
Have you ever tried to connect your iPhone to your TV, but just couldn’t figure out why it wasn’t working? Maybe you were using the wrong cable.
There are a few different types of cables that can be used for this purpose, including HDMI, VGA, and composite cables. But which one is the right one for you?
First of all, let’s start with HDMI. This is probably the most popular choice for connecting your iPhone to your TV because it offers both high-definition video and digital audio in one simple connection. However, not all TVs have an HDMI input (especially older models), so you may need to consider other options.
If your TV doesn’t have an HDMI input or you just prefer a different type of cable, a VGA cable might be the way to go. VGA is an analog connection that doesn’t carry any audio signal, so you’ll need a separate cable for that. However, it’s still capable of delivering pretty good picture quality.
Finally, there’s composite video (or RCA) cables. These are usually the red/yellow/white cables that plug into your TV and have been around since before most of us were born. They’re not quite as high-quality as HDMI or VGA connections, but they get the job done if that’s all you have available.
Now here’s where things get tricky: not all cables are created equal! Just because two cables look similar doesn’t mean they’ll perform the same way. If you’re really serious about getting the best possible picture and sound quality from your iPhone on your TV, there are a few things to keep in mind when choosing a cable:
– Make sure it’s long enough: Depending on where your phone and TV are located in relation to each other, you might need a longer cable than what comes in some standard kits.
– Look for gold-plated connectors: Gold plating can help improve conductivity and reduce interference.
– Check for HDMI version compatibility: If you’re going with an HDMI cable, ensure it’s compatible with the HDMI version your TV is using. The same goes for VGA.
By paying attention to these details and choosing a high-quality cable that matches your needs, connecting your iPhone to your TV can be a breeze – and the end result will be well worth the investment.
How casting apps can transform your viewing experience: Everything you need to know
Casting apps have revolutionized the way we consume media by providing a seamless bridge between our mobile devices and streaming devices. The days of huddling around small phone screens are now gone thanks to these versatile apps that make it easy to stream your favorite content onto your large screen TV or other compatible smart device.
Casting Apps allow you to watch anything from YouTube videos, Netflix shows, and live sports games on a bigger display using devices such as Amazon Fire TV Stick, Chromecast or Apple TV. Even better, this transformative technology opens up endless possibilities of streaming content, cutting ties with traditional cable subscriptions which tend to charge prohibitively high costs for limited channel options.
Here’s what you need to know about casting apps and how they can transform your viewing experience:
Seamless Integration:
Most popular casting applications like Google Home and Amazon’s Alexa offer seamless integration with almost any smart device(Chromecast built-in) in your home ecosystem. Once connected, streaming becomes more convenient than ever before through voice commands via google assistant or simply commanding “Alexa-Switch on”!
Improved Picture Quality:
With an increasing number of 4K televisions hitting the market every day, viewers can now cast their media in High Definition(HD) quality with ease. Casting apps provide flexible viewing options ranging from full 1080p HD resolution to Dolby vision allowing for crystal clear picture and unbeatable sound.
Extensive Media Content:
Casting apps have widened the pool of options available with access to hundreds of thousands of hours’ worth of online programming from various sources across the globe all at your fingertips. You’ll be able to browse streamed content according to language preferences as well as genres that are tailored just for you.
Convenience:
Gone are the days when everybody used long cables or manual connections over cumbersome HDMI ports on their TVs; where users had difficulties hooking up multiple gadgets together manually. With casting apps comes convenience, all it takes is a few clicks to cast media from content provider apps or web-based streaming services onto your TV using your smartphone or tablets.
Cost Savings:
Subscribing to cable can be expensive given the limited channels on offer. Casting Apps like Google Chromecast only retail at about $35 in the US and provide access to unlimited online content, including free programming that would otherwise cost money on your traditional cable service provider. Many people who have cut ties with traditional cable subscriptions report significant savings in their monthly bills
In conclusion, casting apps not only allow for an enjoyable viewing experience but convenience and endless choice as well. By providing more ways for us to consume content online while offering unparalleled flexibility, these applications make watching our favorite shows and videos much more accessible than before. Coupling this technology with smart speakers further enhances ease of use while bringing optimum entertainment straight into our living rooms.
Exploring wireless options for connecting an iPhone and TV: Which method is best for you?
With all the different options available today for connecting our devices, it can be hard to decide which option is best. When it comes to connecting your iPhone and TV wirelessly, there are several methods to choose from. Each method has its own set of advantages and disadvantages that you need to consider before making your decision.
AirPlay
One of the most popular ways to connect an iPhone and a TV is through Apple’s AirPlay. This method allows you to stream content from your iPhone directly onto your TV without any wires. All you need is an Apple TV or an AirPlay-enabled Smart TV, and you can start watching videos, playing games, or showing off photos on the big screen.
The great thing about AirPlay is its ease of use – simply swipe up on your iPhone, select the AirPlay icon, choose your device, and voila! However, one downside is that both devices must be connected to the same Wi-Fi network for it to work properly. If you have a weak Wi-Fi signal in certain areas of your home, this could prove problematic.
Chromecast
Another popular wireless option for connecting an iPhone and TV is Google’s Chromecast. It allows users to cast their screens onto their TVs via HDMI. Like AirPlay-enabled TVs, these televisions do not require additional hardware as the television itself possesses a built-in receiver.
Chromecast offers similar functionality as AirPlay with casting media like videos or movies from one’s phone or even via desktop/laptop Google Chrome browser using options such as “cast tab” so that what we see on our screen displays separately on our larger television display area with a shareable url if need be so friends across town can watch as well!
Miracast
Miracast provides flexible compatibility with other brands while still maintaining high-quality picture resolution when connecting phones (or PCs) directly into supported televisions’ HDMI ports thanks seemingly simple setup steps right out of the box though like Airplay, the devices need to be connected to the same Wi-Fi router network.
Roku
Roku devices offer top-notch streaming services for a good price. It can be more cost-effective as Roku is equipped with over 500,000 movies TV shows and many other features including broadband support, gaming controls, casting abilities and downloadable content rich themes! And even offers its own phones with pre-coded remotes that make operating this device even easier!
In conclusion, there are several wireless options available for connecting an iPhone to a TV. Each method has its own set of benefits and tradeoffs. Before making your decision on which one to go with, consider the compatibility, ease of use, picture quality and costs of each option thoroughly. Essentially it all comes down to your preferences in terms of user-interface design or additional technological requirements. With time researching each route you’ll surely find one perfect for your needs quickly!
Table with useful data:
| Step No. | Step Description | Screenshot |
|---|---|---|
| 1 | Purchase an HDMI cable that is suitable for both your iPhone and TV. | Screenshot |
| 2 | Connect one end of the HDMI cable to your iPhone and the other end to your TV’s HDMI port. | Screenshot |
| 3 | Switch your TV to the correct input mode to display your iPhone’s screen. | Screenshot |
| 4 | If you are unable to get a signal, ensure that your cable is compatible and that your TV is on the correct input source. | Screenshot |
Information from an expert
As an expert in this field, I would recommend connecting your iPhone to your TV using an HDMI cable. First, make sure both devices are turned off before plugging the HDMI cable into your TV and then into the adapter for your iPhone. Once connected, turn on both devices and select the HDMI input channel on your TV. Your iPhone screen should now be mirrored on the TV allowing you to enjoy your favorite shows and movies on the bigger screen. It’s a simple and easy way to enhance your entertainment experience.
Historical fact:
Before the advent of wireless and digital technology, people used to connect their old analog TVs and iPhones using a composite or component cable, allowing them to watch videos and display photos on a bigger screen.
