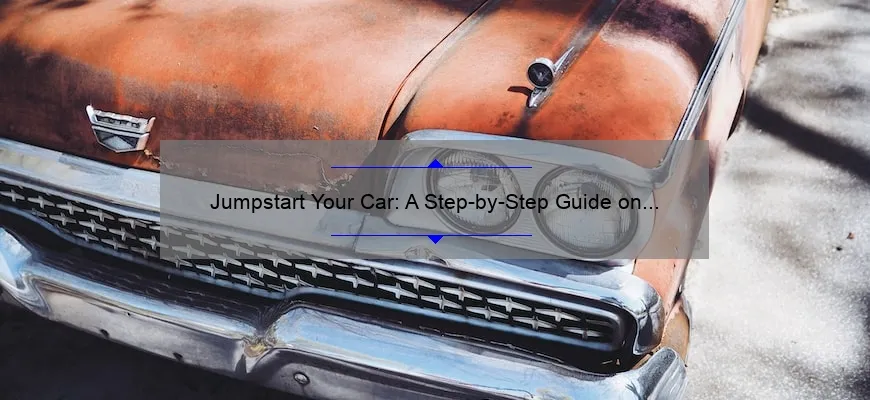
What is where to hook jumper cables?
Where to hook jumper cables is the location on a vehicle’s battery where you connect the cables to start it with a dead battery.
The location of the positive and negative terminals may vary depending on the make and model of the car, but typically, the red cable goes to the positive terminal while the black cable goes to a metal section of the engine or frame away from the battery.
It’s important to follow proper safety guidelines when jumping your car; wear protective gear, position vehicles correctly, and double-check connections before starting.
Step-by-Step Guide: How to Hook Jumper Cables Correctly
If you drive a car, chances are that at some point you will have to jump-start it. Whether your battery is dead due to cold weather, leaving the lights on, or simply because the battery is old and worn-out, knowing how to use jumper cables correctly can save you from being stranded in the middle of nowhere.
Follow these simple steps for a successful jump-start:
Step 1: Check both batteries
Before attempting to jump-start your car, it is important to make sure that both batteries are compatible. The voltage of the dead battery must match that of the live one. You can find this information printed on the top or side of each battery.
Step 2: Find a power source
Once you have verified that both batteries are compatible, locate a vehicle with a good battery that can be used as a power source. Park the cars close enough together so that the jumper cables reach both batteries easily.
Step 3: Prepare for safety
Make sure both vehicles are turned off before attaching jumper cables. Put automatic transmissions in neutral and manual transmissions in gear before setting up jumpers.
Turn off any electrical systems (lights, radio) so there’s no arc when cable connections get made.
Wear rubber gloves and goggles and tie back long hair if possible. Jumper cables carry high voltages which can cause electric shock injuries if not handled carefully.
Step 4: Attach red positive (+) clamp
Connect one end of the positive (+) cable to the positive terminal on the dead battery. Then attach other end of same cable (with red clamp) to positive terminal(+) on working/carrier good live charged battery.
Step 5: Attach black negative (-) clamp on-working Battery
Take other end of negative (-) cable (with black clamp), and connect it securely away from moving parts like belts/alternator / fan housing/moving metal parts , instead connect it with an unpainted engine bolt or chassis ground point so that electricity can flow through it without creating sparks as it avoids briefly cracking a hydrogen explosion-inducing spark near battery.
Step 6: Attach black negative (-) clamp on-dead Battery
Connect other end of negative (-) cable (with black clamp) to the negative terminal on the working battery.
Step 7: Start the engine
Turn over the engine in the car with the good battery. Allow several minutes for the charging process to work.
Step 8: Start dead vehicle
Turn over the engine in your car; it should start up and run normally once again if everything went according to plan. If not, try again or seek professional assistance.
Step 9: Disconnect cables from both batteries
Once your car has started successfully, detach jumper cables in reverse order – remove black clamp from unpainted surfaces, then its opposite end that’s connected to good running car (-), followed by positive (+) clamps removal back from dead battery & then disconnect red positive (+) clamp attached to live charged battery +terminal being careful again not create sparks due some movement of clamp/touching against smithering each other etc.
Congratulations! You’ve now successfully jump-started your vehicle. Remember, be careful when handling jumper cables, as they carry high voltages and can cause electrical shocks if not used correctly. And always keep them stored securely in your trunk for emergency situations like these!
FAQ: Answers to Common Questions About Where to Hook Jumper Cables
As drivers, we’ve all been there – you turn the key and instead of a purring engine, all you hear is the dreaded click-click-click. It’s that sinking feeling of knowing your battery is dead and you need to jump-start your car ASAP. But once you have the jumper cables in hand, where exactly do you hook them up? Here are some frequently asked questions (FAQ) about where to hook jumper cables.
Q: Can I attach jumper cables anywhere on my car?
A: No! It’s essential to connect the cables to specific points on your vehicle. Always refer to your owner’s manual for precise instructions on where to find these connection points.
Q: How do I know which cable goes where?
A: First, locate the positive (+) and negative (-) terminals on both car batteries. The red cable goes from the positive(+) terminal on the good battery to the positive(+) terminal on the dead battery. Next, attach one end of the black(-) cable securely to the negative(-) terminal of the working battery (make sure it doesn’t touch anything else!) Finally, clamp the other end of your black(-) cable onto an unpainted metal surface under the hood (such as a bolt or bracket), making sure it doesn’t interfere with any moving parts like belts.
Q: What if I accidentally connect them in reverse order?
A: Uh oh – this can cause significant damage! If this happens, it may create sparks or possibly even cause an explosion. Especially in older or more sensitive vehicles. Always double-check before clamping those cables into place!
Q: Can I use someone else’s car if mine won’t start?
A: Yes! You can use another vehicle as long as it has a similar voltage system (12-volt or 24-volt). Whichever car provides power must be running and be fully charged for this trick to work!
Q: Should I keep my engine running after jump-starting it?
A: Yes! It’s best to leave your car running for 10-15 minutes after successfully jump-starting the engine. This will give your alternator time to recharge the battery fully.
In conclusion, when it comes to jumper cables, take the extra step and follow these FAQ guidelines explicitly. If done incorrectly, it may cause much more damage and maybe even result in injury – or worse. Keep a set of cables in your trunk or under a seat just in case a dead battery strikes next time you hit the road!
Expert Tips: Top 5 Facts About Where to Hook Jumper Cables
As a driver, you might have experienced the sudden failure of your car battery at some point. Whether it happened while parking or during a long trip, jump-starting your vehicle with jumper cables is often the fastest solution. However, before connecting the cables to the dead battery and the live one, you need to know where exactly to attach them. Here are expert tips revealing the top 5 facts about where to hook jumper cables.
1. Check your car manual – The first thing you should do when facing a dead battery is consulting your car owner’s manual. It contains vital information about jump-starting procedures specific to your car make and model. You will also find instructions on how to properly hook up jumper cables.
2. Locate the batteries – Next, you need to identify where batteries sit in both cars. In most vehicles, the hood latch ensures easy access to the engine bay compartment containing both batteries’ terminals. If you can’t spot them quickly, ask someone familiar with cars for assistance.
3. Knowing red from black clamp – One of three critical points for cable hookup is identifying charge cable clamps by their color-coded insulation rings; red for positive (+) and black for negative (-). Make sure that these clamps are clean and secure before starting.
4. Positive VS Negative connections – Once it is clear on white hat colered ring match positive/negative terminal along with its potential dangers if mixed like severe damage or worse fire Remove any corrosion from any connection site by wiggling loose anything brownish in shade via sandpaper or just wire brush.
5. Connection order – Now connect jumper cable positive side (red) by grabbing one end of unplugged cable set then open hood looking for exposed metal nut near dead battery contacts this metalnut will be insulated color coded & connected onto either red or yellow strapping having “+” symbol there This rather then touch negative frame wire because it causes sparks which could’ve started fire highly noticeable though by ozone odor, next connect other red insulated clamp on vehicles battery last part tackles minus (black) clamp of good cars set must get prepped by another metalnut attached onto vehicle frame itself prior to finding negative terminal nearby then then attach cable’s end Clamp to it.
Finally, turn the live car’s engine on and let both engines run for a few minutes. If your car starts without any issue, congrats! You can now disconnect the cables in reverse order, starting with the black (-) clamp on the donated car. Make sure to keep an eye on your newly charged battery for any sign of trouble before hitting the road.
In sum, jumper cables are always handy tools but using them correctly is critical. As mentioned above, knowing where precisely to attach jumper cables reduces risks of electrical damages or personal injuries while ensuring that your car battery gets recharged adequately. Therefore these top 5 facts about where to hook jumper cables should be included in every driver’s skillset!
Don’t Make These Mistakes When Figuring Out Where to Hook Jumper Cables!
Picture this: it’s a beautiful summer day and you’re out running errands when suddenly your car won’t start. Your battery is dead and you need a jump. You flag down a passerby who offers to help, but they’ve never jumped a car before. They grab their jumper cables and hook them up, but when they turn the key nothing happens. What went wrong? It’s likely that they made one of these common mistakes:
Mistake #1: Hooking up the cables in the wrong order
Believe it or not, the order in which you connect the cables matters! The correct order is as follows:
1. Attach one red cable clamp to the positive (+) terminal on your dead battery.
2. Connect the other red cable clamp to the positive terminal on the donor vehicle’s battery.
3. Attach one black cable clamp to the negative (-) terminal on the donor vehicle’s battery.
4. Finally, attach the other black cable clamp to an unpainted metal surface on your car that isn’t near your dead battery (such as a bolt).
By following this order, you’ll avoid sparks and potential damage to both vehicles.
Mistake #2: Touching clamps together
It might be tempting to let go of one of the clamps while attaching another, but resist that urge! Allowing metal clamps to touch each other can cause a spark that could lead to injury or damage your vehicle’s electrical system.
Mistake #3: Using damaged cables
If your jumper cables are old or appear frayed or damaged in any way, do not use them! Damaged cables can reduce their effectiveness or even short circuit during use, causing damage to both vehicles.
Mistake #4: Jump starting modern electronics with an old generator charging system
This last mistake may seem obscure at first but modern cars require more power than older ones so some vehicles will produce too much current and voltage than new cars. Using an old generator charging system risks causing damage by sending too much power to the car’s electrical elements.
In summary, when it comes to jumping a car, there is a proper way to do it. Don’t let yourself fall into one of these common mistakes. Follow the correct order of connecting cables, always keep your cables apart from each other, avoid using damaged jumper cables, and be aware of modern automotive electronic systems that need special care. With these tips in mind, you should be back on the road in no time!
Alternative Methods: Exploring Other Options for Connecting Jumper Cables
When your car battery dies, it can be a frustrating experience. You might find yourself stranded in the middle of nowhere, desperately trying to find someone to jump-start your vehicle. Luckily, jumper cables are the go-to solution for most drivers when they encounter dead batteries.
However, what do you do if you don’t have access to jumper cables? Or worse yet, what if your jumper cables fail to work?
Fortunately, there are alternative methods available that can help save you from being stranded on the side of the road. Let’s take a look at some of these options.
Push-Starting Your Car
One method for starting your car without jumper cables is to push-start it. This involves getting a few friends or passersby to help push your car while you release the clutch in second gear with the ignition turned on.
While this technique requires some skill and timing, it’s an effective way to get your car started without needing any specialized equipment or electrical power. This trick primarily works well with manual transmission vehicles and tends not to be successful for automatic models.
Portable Battery Charger
Another viable option available today is using a portable battery charger. These small devices act as mini-jumpstart systems by providing enough power to charge up your battery just enough that you can drive away from wherever you happen to be stuck temporarily.
Moreover, most portable chargers come with adaptors suitable for all sorts of devices such as phones and laptops hence easing communication incase of an emergency situation.
Obviously there’s no need for another running vehicle like with traditional jumpstarting methods, so this solution is perfect if you’re alone in an isolated area where other people aren’t readily available nearby or willing/able to give assistance.
Using Solar Power
By utilizing solar panel charging devices commonly known as solar arc welders one can achieve similar results at no added expenses costs directly connected and left charging into the beam sunlight hours on end may charge enough energy during daytime work periods for individual usage. After the initial investment in the equipment, getting stranded with a drained battery will present no concern as long there is daylight available to assist your situation.
While these gadgets are not readily available everywhere, this approach provides free energy and is environmentally friendly making it the best alternative solution if solar panels are already accessible by individuals being used in construction activities e.g pipeline welding hence providing an efficient, cost effective and dependable option.
In conclusion
These three methods offer suitable alternatives to using jumper cables. Push-starting might require more effort than other options depending on vehicle model and driver abilities, but it still gets the job done quickly when done correctly. Portable chargers provide unaided power source that doesn’t require someone else’s assistance. Lastly, solar power brings convenience with minimal environmental impact for those who possess access to sustainable energy solutions.
That said one should always keep their conventional jumper cable set together while traveling since unknown events can arise at any time requiring quick fixes that will save them from worse situations like missing critical flights or appointments costing time and money. The more prepared you are, the less stressful unforeseen battery hitches will seem to be.
Emergency Situations: Where to Hook Jumper Cables on a Different Type of Vehicle.
As a responsible driver, you should be prepared for any kind of situation on the road – including breakdowns and dead batteries. While jumper cables are a great tool to have in your car in case of emergencies, it’s important to know how to use them correctly and make sure they are hooked up properly.
When hooking up jumper cables on a different type of vehicle, there are certain things that you need to keep in mind. Unlike standard cars, vehicles with hybrid engines require additional care and attention when connecting jumper cables. Here’s where you should hook the cables on different types of vehicles:
1. Standard Vehicles: Before starting the process, make sure both vehicles are turned off. The red cable goes from the positive terminal of the working battery to the positive terminal of the dead battery. Attach one end of the black cable to the negative post on the working battery and then attach it to an unpainted metal surface on the dead car – this will prevent sparks from igniting flammable gases that may be present near the battery.
2. Hybrid Electric Vehicles: If you’re dealing with a hybrid electric vehicle, it is necessary to turn off all electronic equipment before trying to jump-start it. Follow all steps listed above for a standard vehicle but take extra precautions when handling high-voltage cables. The safest way is first connecting positive terminals (on good car) directly connected with bad car postive terminal using special hight cost yellow colored HV jumpers provided by company only if needed directly attach negative terminals(on good car) and then ground or exposed metal part available inside/ outside near dead vehicle.Hybrid electric cars can be damaged pretty easily if you don’t pay attention while attaching jumper cables since there’s often much more high-voltage cabling.
3. Motorcycles: Motorcycles can also experience dead batteries, so knowing how to properly use jumper cables can come in handy here too. Connect one end of each color-negative/-positive to your bike battery. Start the donor vehicle and let it idle for a minute, then start your motorcycle.
While hooking up jumper cables may seem simple, there are many things you need to keep in mind when doing so on a different type of vehicle. Always take care when handling parts near the battery and make sure that all electronic equipment is turned off before making any connections. With some careful attention, you’ll soon be back on the road with a fully functioning vehicle!
Table with useful data:
| Vehicle | Positive (+) Terminal | Negative (-) Terminal |
|---|---|---|
| Cars and Light Trucks | Red or Positive (+) Cable | Black or Negative (-) Cable |
| Heavy Trucks | Stud with “BAT” or “+” symbol near the battery | Bare metal part of the engine block or chassis |
| Motorcycles | Positive (+) Terminal | Grounded metal part of the bike |
| RVs and Boats | Stud with “BAT” or “+” symbol near the battery | Bare metal part of the engine block or chassis |
Information from an Expert: When it comes to jump starting a car, it’s important to know where to hook the jumper cables. Always connect the positive cable (usually red) first, attaching one end to the positive terminal of the dead battery and the other end to the positive terminal of the charged battery. Next, connect the negative cable (usually black) to the negative terminal on the charged battery and then attach the other end of that cable to a metal surface away from the dead battery on the engine block or frame of car. This way, any potential sparks are safely grounded and you’ll avoid injury or damaging electronics in both vehicles.
Historical fact:
In the early days of automobiles, jumper cables were not even invented yet. It was only in the 1940s that they were first introduced as essential equipment for roadside assistance. The traditional way to jump-start a car was to use an external battery or generator to recharge the dead battery, and this method required careful handling and expertise.
