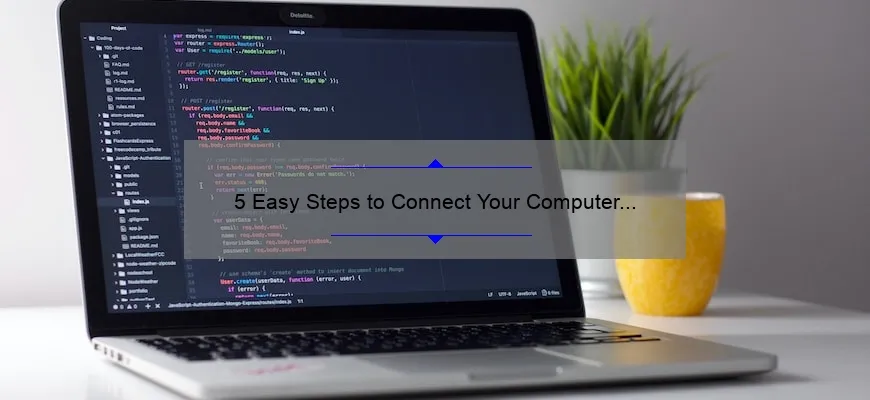
What is how do I hook up my computer to my printer?
How do I hook up my computer to my printer is the process of connecting your printer and computer to enable printing from your computer. There are two main ways to connect your printer: through a USB cable or wireless network. You will need the appropriate cables, software, and settings for either option.
To connect via USB cable, simply plug one end into your printer and the other into your computer’s USB port. Your operating system should automatically recognize the device and install necessary drivers if needed.
To connect via wireless network, make sure both devices are connected to the same network. Then, run the printer’s software on your computer and follow instructions for connecting wirelessly.
The Top 5 Important Facts for Setting Up Your Printer with Your Computer
Printers have become an essential part of our lives, be it in the workplace or at home. Whether you need to print important documents, photos, or artwork, a good printer is a must-have device. Setting up your printer with your computer can be a daunting task if you’re not familiar with the process. This is where we come in – in this article, we’ll discuss the top 5 important facts that will help you set up your printer with your computer like a pro!
1. Installation Process
The first step to setting up your printer with your computer is installing it properly. This involves unpacking the printer and its components from the box and setting it up using the manufacturer’s instructions. Most modern printers come with an installation CD/DVD which contains all necessary drivers and software for installation. However, some computers may not include a CD drive anymore; in those cases, check to see if there are downloadable drivers on the manufacturer’s website.
2. Connection Type
Once you’ve installed your printer software onto your computer (or downloaded them), make sure to connect your computer and printer correctly. There are several types of connections available today- USB cables being one of the more common ones but there are also Wi-Fi enabled printers that can link wirelessly to computers over home networks.
Before connecting any cord or cable between your computer and other devices such as printers remember to turn off both devices/controllers! Safety always comes first.
3. Driver Updates
Your printer may work perfectly well when you initially set it up but over time manufacturers release updated drivers that address bugs fix issues or add features so ensure that periodically check for driver updates online and download them onto any connected devices if required.
4. Printer Settings
Once you’ve completed setting up everything else – including installing drivers and software -the next step is configuring settings for printing via different applications such as Microsoft Word/Excel/Powerpoint etc., web-pages or image files. Common settings include paper size, resolution, double or single-sided printing, color vs black and white etc.
5. Print Quality & Maintenance
Lastly, always prioritize print quality when setting up your printer with your computer. Regular maintenance of your printer will ensure that it not only lasts but also keeps working efficiently indefinitely helping you save money in the long run. You’ll want to periodically check on ink levels in cartridges see if there are any nozzle clogs from previous print jobs that may impact the clarity and sharpness of future printed text/images — as well as ensuring firmware updates are recent by checking with manufacturer’s website or support team regularly for new releases too!
In conclusion, There’s no straightforward answer to setting up a printer with a computer since electronic products like printers could have several variations of configurations and steps required depending on specific models; but following these tips should help you feel more confident when doing so. Don’t hesitate to reach out to the manufacturers support team or forums online if needed – good luck!
Common FAQs on Connecting Your Computer to Your Printer
With printers becoming an essential piece of equipment for individuals and businesses alike, it’s important to understand how to properly connect your computer to your printer. While the process may seem daunting at first glance, it’s actually quite simple once you know what to do. Here are some common FAQs regarding this task that will help you get started.
1. Can I connect my printer wirelessly?
Yes, most modern printers come equipped with Wi-Fi connectivity that allows it to connect directly with a wireless network and other devices on that network without cords.
2. How do I connect my printer via USB cable?
If your printer didn’t come with built-in Wi-Fi connectivity or if you prefer a wired connection, then all you need is a USB cable. Once connected, your computer should automatically recognize and install the necessary drivers for the printer.
3. Why is my computer not recognizing my printer?
This can be caused by a number of factors such as outdated software or drivers on either end of the connection, incorrect settings in your computer or printer software, or even faulty cables or ports. Restarting both devices and checking for updates can often solve this issue.
4. How do I find the right driver for my printer?
Printer manufacturers usually provide downloadable drivers from their websites specific to each model they sell along with its corresponding operating system (Windows or Mac).
5. Do I need specialized cables for connecting my printer?
In most cases regular USB cables work fine but certain types of printers may require specific types of cables like parallel port connectors or even Ethernet cords if they have RJ45 ports.
6. What should I do if there’s no option to install my printer’s software?
This could occur when using newer PC models that automatically install standard drivers upon detecting new hardware instead of prompting users with installation options; Most Windows versions auto-detects peripheral hardware, tries installing appropriate drivers based on generic ID codes which sometimes doesn’t cover customized electronic peripherals such as printers. In this situation, it’s best to manually install the drivers from the manufacturer’s website (as mentioned earlier).
In conclusion, connecting your printer to your computer shouldn’t be a challenging task. By understanding the process and addressing any potential issues along the way, you can ensure that you get a stable connection that works seamlessly without interruption. With these FAQs in mind, printing documents can be stress-free and effortless.
The Importance of Compatibility When Hooking Up Your Computer to a Printer
As a professional, you know how important it is to have the right tools at your disposal. That’s why, when it comes to hooking up your computer to a printer, compatibility is key. In this blog post, we’ll take a closer look at why compatibility matters and what steps you can take to ensure that your devices work together seamlessly.
First and foremost, compatibility ensures that your computer can communicate with the printer. Without this essential connection between the two devices, printing simply isn’t possible. Thankfully, most printers come equipped with software drivers that allow them to easily connect with computers running different operating systems such as Windows or Mac OS X.
Compatibility also ensures that your computer and printer will be able to share data effectively. When you print something from your computer, whether it’s a document or an image file, it’s important for the printer to be able to interpret all of the information accurately. If there are any incompatibilities between these two devices or their respective software programs, then errors or delays may occur.
Another key reason why compatibility is important when hooking up your computer to a printer has to do with performance speed and accuracy. For instance if you’re using an older printer model on newer computer hardware components like faster hard drives in SSDs (Solid State Drives) rather than traditional mechanical disk drives (HDDs), this often results in longer wait times before printing tasks complete causing frustration especially when deadlines approach fast.
So what should you do if you’re having trouble getting your computer and printer working together? First off check both manual guides for specifications on supportability across diverse platforms . Additionally, consult online resources available through websites of companies like HP themselves which may detail specific instructions or tools for troubleshooting issues with certain models under their brand name based on customer feedback from previous product reviews.
Another great solution is reaching out directly over phone support lines offered by third-party vendors who specialize particularly in device compatibility until those issues get resolved or suggest alternative solutions to explore upgrading video cards RAM or sometimes updating the drivers in your system software.
In conclusion, compatibility is one of the most important things you need to consider when hooking up your computer to a printer. Without it, there’s simply no way the two devices can communicate effectively and data transfer will be dicey at best. But with a little research and perseverance, you can find the right software drivers and support services available that keep both your computer system and its connected printers running at optimal levels, ensuring that you’re always productive even when dealing with daily printing tasks.
Troubleshooting Tips for When You Can’t Connect Your Printer to Your Computer
There are few things more frustrating than trying to print out an important document or picture, only to find that your printer won’t connect to your computer. Whether you’re dealing with a wired or wireless printer, there can be a number of reasons why the connection isn’t working. Luckily, there are also a number of troubleshooting tips that you can try to get your printer and computer communicating again.
Firstly, make sure that both your printer and computer are switched on and properly plugged in. It may sound like a basic step, but sometimes we overlook the obvious! Check all cables and connections for signs of damage, looseness or dislodging. Try unplugging everything from the power source and plugging it back in securely.
Secondly, ensure that your printer is connected to the same network as your computer. If you have a wireless printer, it should automatically connect to the correct network if it’s available within range. Otherwise look for any signals flashing on the physical buttons – these should indicate what needs attention: Wi-Fi button (solid = connected), Information/Wrench/Tools Button (Configuration Summary = indicates signal strength), etc.
Thirdly, ensure that both devices are using compatible software drivers installed on their respective devices – this is particularly important if updating system software has taken place recently. Compatibility checks will avoid conflicts between what was previously running and new updates introduced onto one’s computer/network which could disrupt communication between devices altogether.
Fourth – check how many printers show in device manager under “Printers & Scanners”. Often times people discover they accidentally added multiple instances of their own hardware by simply clicking on add/remove printers while attempting to troubleshoot some minor issue – every time rescan would create another driver file “version”. Remove them all except one actually detected currently recognized device.
Fifth – try firing up Install wizard/port scanner… man/miracle utility tools abound in cyber world… every manufacturer practically offers easy click gui control panels, with easy-to-follow installation instructions, in case they’re missing from original dvd media install package. Having one of such software apps running simultaneously on the computer will take care of just about any hardware recognition issues you might have.
Finally, in case you all else fails there’s still a surefire way to get your printer working again: contact the manufacturer! Chances are that the company has a customer service line or online support system that can help diagnose and fix whatever is preventing your printer from connecting to your computer. Don’t hesitate to ask for help – it’s their job and they are more than happy to assist if problems persist.
In conclusion, while troubleshooting the connection between your printer and computer may be frustrating at times, don’t give up hope! By following these simple steps, you’ll be well on your way to getting back up and printing in no time. Just remember to stay calm, patient and thorough.
Advanced Options: Wireless Printing and Network Connections
In today’s world, the need for seamless connectivity and wireless printing has become more prevalent than ever before. With the advancements in technology, you can now perform various operations with just a few clicks of a button. One such operation is wireless printing.
Gone are the days when you had to be physically present beside the printer to get a printout of your document or photo. Now, with just one click, your documents or photos can be printed from anywhere in the world. It may sound like magic, but it is possible through advanced options like wireless printing and network connections.
If you’re wondering what these advanced options mean, let me break it down for you.
Wireless Printing
Wireless printing simply means that you can print any document or picture wirelessly without having to connect your device directly to the printer using a cable. This can be done by either connecting your device to the Wi-Fi network that your printer uses or by connecting both devices via Bluetooth.
For example, if you have an iPhone or an iPad and want to print something out on your HP printer, all you need to do is go to ‘Print’ option in your phone’s Settings menu and connect it wirelessly with your printer. After that, select the document or photo that you want to print and voila! Your printout will start printing on the connected device within seconds.
Network Connections
The term “network connection” might seem daunting for some, but it is essentially just establishing connectivity between two devices over a shared network connection. By doing so, multiple devices can access the same resources, such as the internet connection or printers.
In today’s age of technology, we’re surrounded by various devices such as smartphones, laptops and tablets – all of which need access to Wi-Fi networks for uninterrupted internet surfing experience. But ensuring that all these devices stay connected across different platforms could sometimes be challenging – until now!
Thanks to advancements in network technology hardware and software, there are now more options than ever before to connect different devices without any compatibility issues. Bluetooth, Wi-Fi, wired Ethernet – whatever your needs may be, there’s a networking solution that will work for you.
In conclusion, wireless printing and network connections are advanced options that have made our lives easier by eliminating the need for cables and physical proximity between devices. These technologies have also facilitated seamless collaboration among co-workers or friends by enabling multiple devices to access resources simultaneously. You can set up these options yourself or seek help from professionals who will ensure that your connections work seamlessly without any hiccups.
Making the Most of Your Connected Devices: Tips for Utilizing Printers with Multiple Computers
As technology becomes more sophisticated, we find ourselves surrounded by an increasingly interconnected world. Our laptops, smartphones and tablets are all linked together through the wonders of the internet, creating a web of convenience that makes our lives easier and more efficient. But with so many devices to keep track of, it can be difficult to ensure they work seamlessly together – particularly when it comes to printing from multiple computers.
Luckily, whether you’re operating in a small office or sharing a home network with roommates or family members, there are a few easy tips and tricks you can use to take full advantage of your printers and make them work for everyone involved.
1. Centralize Your Printing
Rather than having each device connect directly to its own printer, set up one central printer that is accessible from all computers on your network. This will help avoid confusion over which printer needs paper or what ink cartridge is required for each device. It’s much easier to maintain one single machine that everyone shares than trying to manage multiple printers on separate devices.
2. Get Everyone Connected
No matter how many computers you have accessing your centralprinter,it’s important to make sure everyone is connected and able to print easily. Be sure to enter the correct security information such as password and network name when setting up each computer’s connection so that there aren’t any connectivity issues later down the line.
3. Optimize Your Printer Settings
Many modern printers now feature software that allows you to customize settings based on individual printing preferences – these include features like double-sided printing or draft mode which use less ink without significantly sacrificing quality.This customization not only saves toner but reduces waste as well which cuts down expenses.In addition these settings allow users print in color/black & white mode so select accordingly depending upon their need & preferences .
4.Use The Right Paper Stock For The Job
Different tasks call for different types of print media – photo paper for high-quality prints, card-stock for invitations or business cards, or just basic copy paper for everyday use. Make sure to keep a range of paper types available and note which type should be used for each job.
5. Manage Your Ink and Toner
Running out of ink or toner at the wrong time can be frustrating – so make sure you have a backup supply ready when your machine begins indicating low levels. In addition, consider enrolling in an automatic ink/Toner delivery that would send the replacements just when you need them without thinking twice . This is an effortless method to never run out of ink again.
By following these simple tips, you can ensure that all computers on your network get their fair share of printer usage while avoiding frustration over technical difficulties. Remember that printers are there to help us work smarter – not harder – so make the most of them!
Table with useful data:
| Step Number | Instructions |
|---|---|
| 1 | Make sure your printer is turned on and connected to your computer |
| 2 | Locate the USB port on your computer and plug in the printer’s USB cable |
| 3 | Wait for your computer to recognize the printer and install any necessary drivers (you may need to download these from the printer manufacturer’s website) |
| 4 | Open the document or image you want to print and select “Print” from the File menu (or use the keyboard shortcut Ctrl+P or Command+P) |
| 5 | Choose your printer from the list of available printers and adjust any settings (such as paper size or print quality) as desired |
| 6 | Click “Print” to send your document or image to the printer |
| 7 | Wait for the printer to finish printing your document or image |
| 8 | Disconnect the printer’s USB cable from your computer when you’re done |
Information from an expert
As an expert, I understand that hooking up your computer to your printer can be a daunting task for some. First, you should ensure that both your computer and printer are turned on and that they are connected to the same network if they are both wireless. If your printer is wired, make sure it is connected to your computer via USB cable. You will then need to install the necessary drivers for your printer on your computer by following the manufacturer’s instructions or utilizing automatic installation software. Once this is done, you should be able to print directly from your computer to your printer without any issues!
Historical fact:
The first computer printer, called the Xerox 9700, was introduced in 1977 and required a dedicated room with special air conditioning due to its large size and high-temperature output.
